ADAPT... - ArCADia BIM 11 - part 1
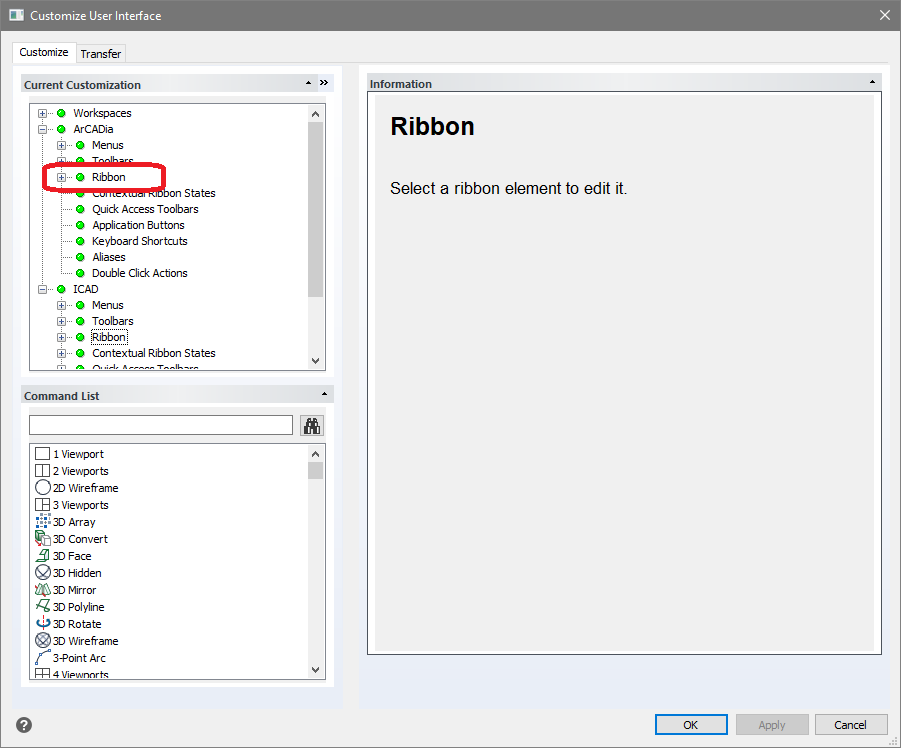
The Adapt window looks completely different in ArCADia 11 and at first glance we do not know how to change anything in it. After a moment, however, it will turn out to be very intuitive.
We'll start with the Customize tab. From this tab, we choose what we want to modify and we expand a given branch. Let's start with the ribbons.
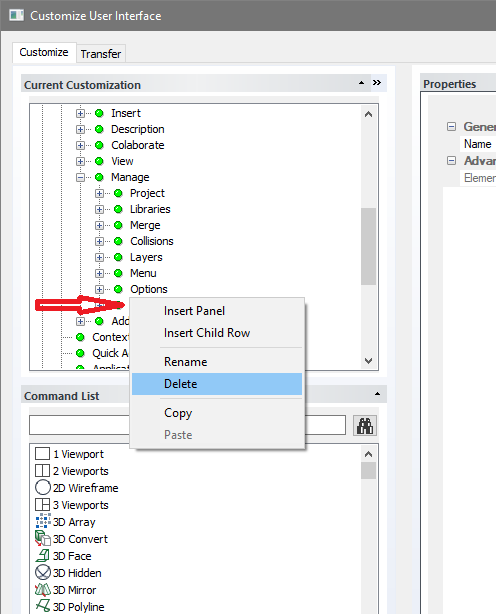
We choose the ribbon that we want to modify and we also expand it. Then, if some part of the icons does not suit us, we select and delete them (by right-clicking the mouse and choosing the appropriate option).
As you can see above in the context menu, i.e. the list shows additional options that allow you to add a panel or a specific option.
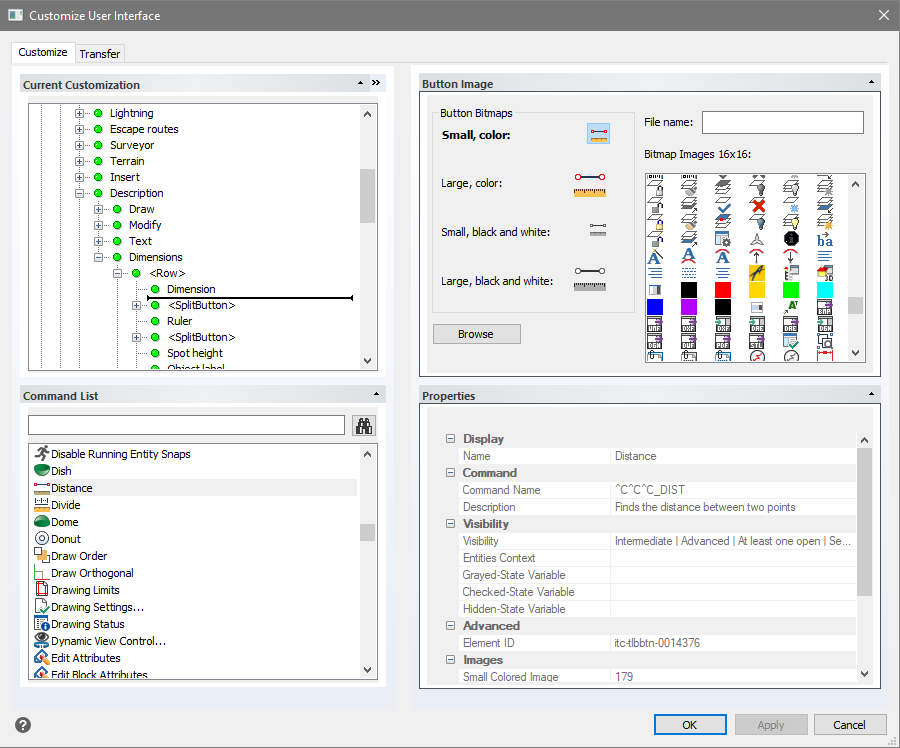
If we want to add an option, we start by showing the place where it is to be found, i.e. we expand the list so as to have access to the options between which the new icon will appear.
From the Command List, we select the option that we want to place on the ribbon and by holding the left mouse button we move this option to the designated place (where we release the key held). Please remember that after selecting this option, you should wait a bit for all information about the given command to appear on the right side of the window. Only then the options can be added to the ribbon or toolbar.
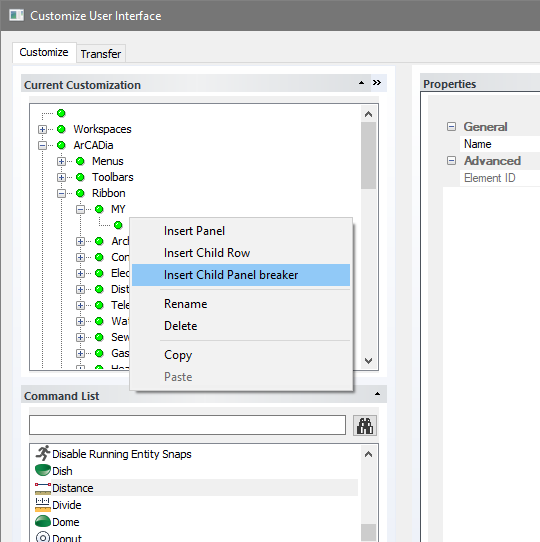
This is how we proceed with the next options. If we want to add our own ribbon, we click on the ribbon in front of which we want to add our own ribbon and from the provided list by right-click we choose Insert card. After entering the name, we right-click and select Insert Child Panel from the list. After entering its name, right-click on it and select Insert Child Row from the list. After this operation, we can add our own options from the Command List. If we would like to divide them with a vertical line for separation, after right-clicking on the list we select Insert Child Panel breaker.
The options from the context menu list will help when inserting e.g. a drop-down icon.
When finishing the modification, BEFORE leaving the window, we must remember to click on Apply button, which is located at the bottom right of the window.
If we do not do this, no changes will be made.
We proceed in a similar way when modifying toolbars or the context menu, i.e. the lists that appears after clicking the right mouse button.
Copyright © 2021 ArCADiasoft
ГОЛОВНА | ПРОДУКЦІЯ | ПРО НАС | КОНТАКТИ | ДЛЯ ПРЕДСТАВНИКІВ


