ArCADia BIM: Expanding the 3D Objects Library
If the built-in library of 3D objects in the ArCADia BIM program is insufficient, you can expand the library in various ways. One option is to buy libraries defined for ArCADia.
The entire range of available 3D elements can be found here: https://arcadiabimsystem.com/-arcadia-bim--basic--industry-modules-for-windows--cad-software
For example, the ArCADia-GARDEN library:
You can also download objects from the Internet. There are many sites with free .3ds objects that you can use to bring variety to your visualizations.
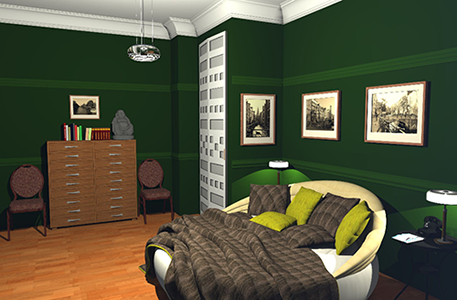
Below are a few sample visualizations based on objects downloaded from the Internet.

We will not describe how to search for an object, because everyone knows how to do it.
What is important are the file extensions of the elements that can be introduced into the ArCADia BIM program which are: .3ds, .aco and .o2c.
The last two, are object formats from the ArCon program, mostly available on the websites of furniture manufacturers. But we will describe the import of these formats later.
We will start with .3ds files, which, after downloading (and usually unpacking), can be imported into the program. If there were textures in the downloaded package, remember to put them in the same directory as the object. Objects are imported from the Object Explorer window, from the 3D Objects tab located on the Insert ribbon.
If you click the Import icon 
A new directory is created with the Add folder option 
Firstly, let’s check if the size of the object is correct. You can change the Units or Size (most elements have a strange format, so usually you have to adjust it). If you change one value, for example the z value, the other values x and y will be changed automatically. The second step will be to define the position, i.e. how the object will behave when entered into the program, whether it will fall to the floor or fly to the ceiling.
Of course, you can also define the Name, and the most importantly the Symbol of the object. We suggest creating it last, because with more complex objects it may take a while. The symbol does not have to be created, but if you have only crossed out rectangles on the view, you will not know what is what. The objects Icon, i.e. the 3D preview, is always created, but we can modify it before clicking the Create >> button by rotating the object in the preview. After changing all the necessary parameters, confirm the import with the OK button.
As for the import of .aco and .o2c objects, it is analogous to the one described above. However, if we have ArCon installed in any version, we can transfer its entire library to the ArCADia BIM program. Unfortunately, directory by directory only, but this way, your library will be enlarged. First, however, in the program options, you have to enter the textures path from the ArCon program.
Choose the Texture Folder and show the directory path.
After defining the textures, you can return to the Object Explorer window and in the appropriate directory, click on Import. You can now find the catalogue and select all the objects that are of interest you.
Then, selecting each object, follow the same procedure as importing a single .3ds object.
Copyright © 2021 ArCADiasoft
ГОЛОВНА | ПРОДУКЦІЯ | ПРО НАС | КОНТАКТИ | ДЛЯ ПРЕДСТАВНИКІВ


