ArCADia BIM: Texture Differentation on Walls - method 2
The simplest example of differentiating the colours of the facade is by introducing three horizontal blocks of different width and texture, placed on top of each other on the last level. In the above case, the vertical stripes are the columns.
A bit of extra work will be required if the texture to be changed is only on a part of the wall.
The above example has a solid placed on the wall between the windows, or rather several solids. Thin stripes stacked on top of each other. The solid is used between the windows and between the windows and the edge of the wall at the same heights. The stripes are thin, but they are enough for the facade to change its nature.
In this case, almost the entire elevation is covered with solids of various sizes. The width is the same: 2cm, but the height and length are different. There are 5cm gaps between the solids, which give them three dimensionality. In the 3D view, at a greater distance, sometimes you can see the interpenetration of walls and solids, stripes are formed at an angle, but when the viewing angle is changed and they are rendered, they are no longer present. It's just a small distortion at a greater distance.
This type of elevation could also be done by creating an appropriate texture. In any graphics program, you can create any composition that we will later put on the wall. Before saving, the created texture should be separated into the appropriate number of levels, and saved separately. Then, on each level, apply a texture by defining its dimensions: width is the length of our wall, height of the texture is the height of the wall (level). Remember, however, that if you do not use a light and shade simulation in this composition, you will not get it on the wall. The texture is flat and you won't get shadows from it.
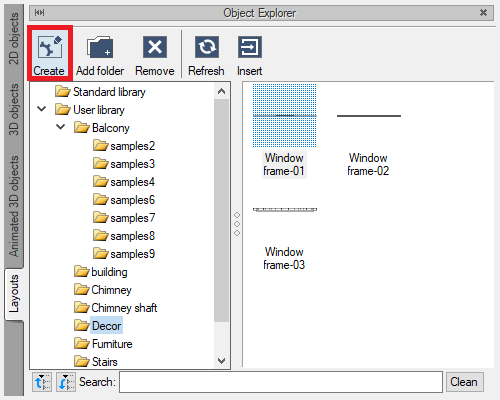
The last example is a combination of texture and solid. The asymmetrical texture is stretched full height over the walls. On top of that, the fragments are superimposed with solids, mostly repeating elements. After creating a window framing, the solids can be copied or saved as an object or layout. This will allow you to compose the elevation faster. If you save such a frame as an object (the option is available in the Object Explorer window, from the 3D Objects tab), then you can enter them freely in subsequent windows. You can easily introduce them, for example, on consecutive walls, on a different elevation, because you show the rotation when inserting the object. Another argument in favour of saving the frame as an object is that if windows on another level are placed higher or lower, you can easily define the height for the entered object.
For a layout (the option is available in the Object Explorer window, on the Layouts tab), to change its height, you need to break apart and edit subsequent elements. Later you can merge them again and save another layout. In the case of an object, you must remember that after saving it cannot be separated, it will always look the same, unless you change its size in one of the axes, which will cause its distortion. This is an advantage of the layout, if you want to insert it next to a higher window, or surround not two, but three windows, you can split the layout and edit it.
When saving an object, its preview depends on you, you can set it so that you can see what it shows as best as possible, while the system saves the preview from the view, which means that if we have several layouts with a similar name, at first glance you may not distinguish them.

So both elements have their advantages, you have to decide which option to choose.
Some examples of texture differentation on walls in ArCADia:
Copyright © 2021 ArCADiasoft
ГОЛОВНА | ПРОДУКЦІЯ | ПРО НАС | КОНТАКТИ | ДЛЯ ПРЕДСТАВНИКІВ


