ArCADia BIM 11– Creating Your Own Shortcuts
The customization of ArCADia BIM 11 and ArCADia BIM PLUS 11 has changed a lot compared to the previous version. We have already described how to modify ribbons and toolbars, so it is now time for Aliases and keyboard shortcuts.
We will split both topics into two parts, although the definition and transfer are analogous.
We'll start with the keyboard shortcuts, i.e. a combination of function keys (Shift, Ctrl, Alt, F1-F12) with letters and numbers. Obviously, the shortcut can contain more than one function key, but it is followed by either one number or one letter.
Everyone knows the shortcuts :)
- Crtl + C - copying
- Ctrl + V - pasting
- Ctrl + S - saving
- Ctrl + Z - undo
Most of the programs running on the Windows platform support these shortcuts, but in addition they have many other features specific only to this application, or other applications of this type. For example, working on most CAD programs (AutoCAD, Zwcad, ArCADia, INTERsoft-INTELLICAD etc.) the shortcut F8 will be associated with the Ortho function, because this command is assigned to it.
There are many shortcuts in CAD programs that will help you execute a command faster, but you must get to know them. After right-clicking on the options on any ribbon from the context menu, that is a drop-down list, we can choose Customize ...
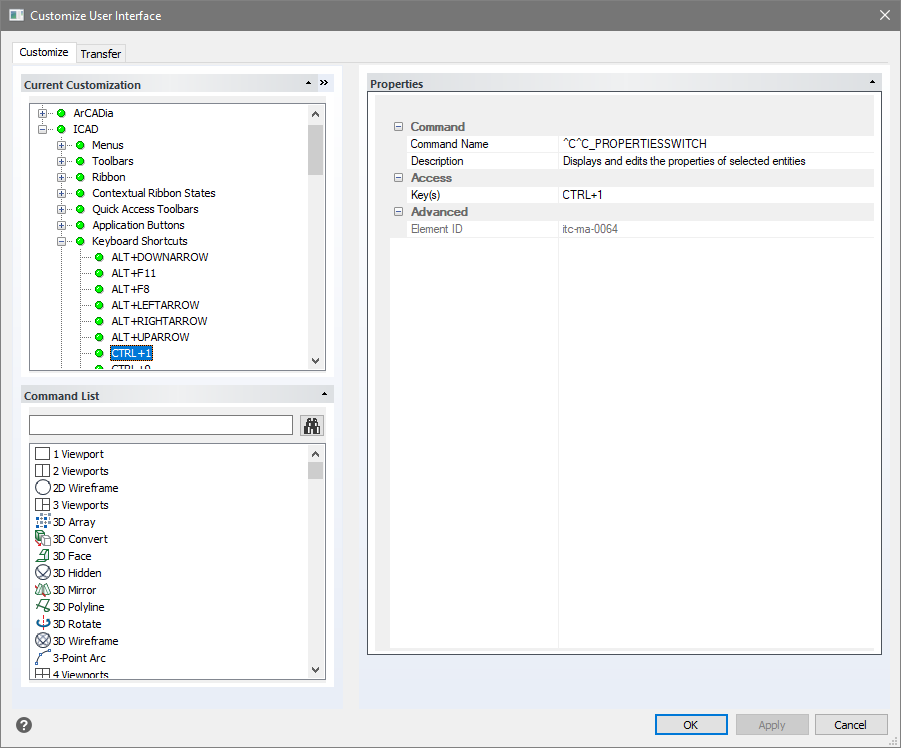
We have already described the displayed window. As a reminder, if we want to add, define our own keyboard shortcut (or another part of the program interface) we can find it on the Customize tab. If we have a .ick file saved e.g. in the previous version of the program with the shortcuts we have defined there, we go to the Transfer tab.
Before defining your own shortcuts or importing them from an earlier version of the program, it's a good idea to review the shortcuts, a few have been added, and you can't overwrite them. If there is already a shortcut connected to another command, we need to remove it first and then we can add our own. Please note that not every shortcut can be removed and replaced.
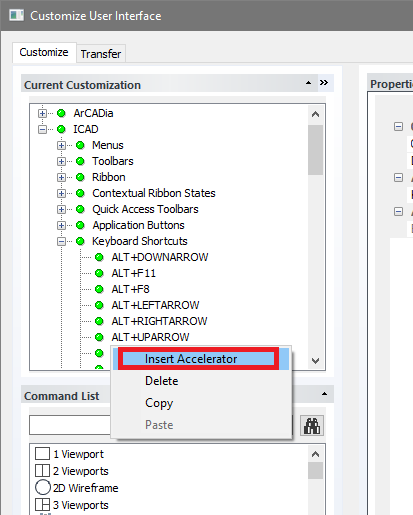
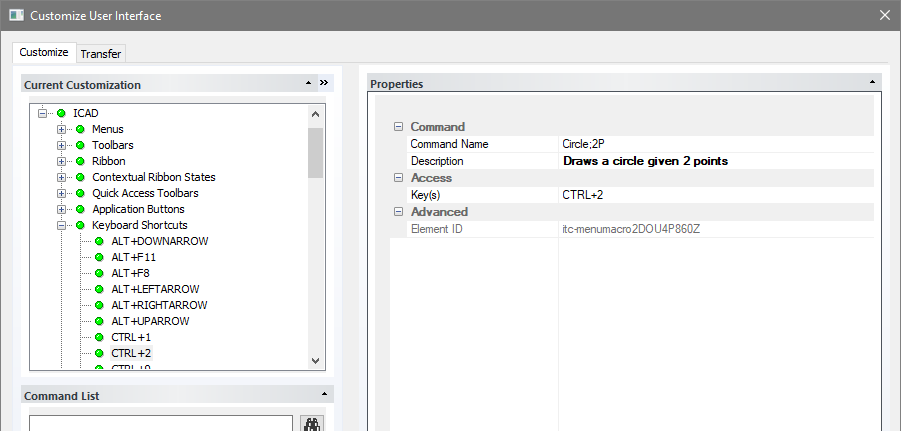
Selecting a shortcut in the tree on the left side, displays its properties on the right. If we want to remove or add key combinations, we click on it with the right mouse button and select the appropriate command from the list.
Insert accelerator - this command allows you to define a new shortcut. Other elements from the list copy and delete the selected combinations.
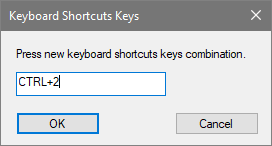
If you selected the Insert accelerator, a window will appear in which you need to enter a new shortcut.
For example, we will define a command that will draw a circle using two points, this is why Ctrl and the number 2 are selected from the numeric keypad.
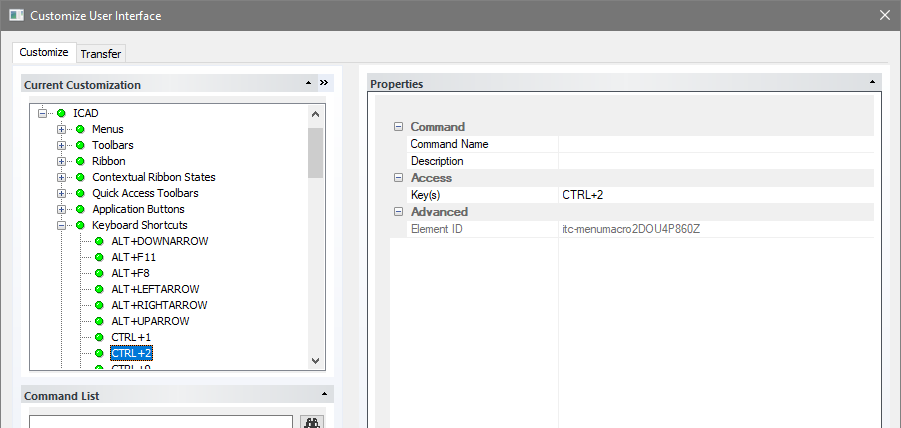
After clicking OK on the right side of the window the properties will be cleared and you will need to fill them in yourself. The most important is the Command name. We can enter the Description, but it is not necessary.
We can enter a command in any language in the command name, for example to define a shortcut for entering lines, we would enter Line there. Because this example is more complicated, first we type Circle, because it is the main command, and then dividing the subcommands using punctuation mark ";" than we enter 2 points and we confirm by pressing Enter.
If we want to enter another shortcut, we proceed in the same way. After defining the new combinations, we must remember to press the Apply button and then OK.
From now on, using the shortcut Crtl + 2 (from the numeric keypad) will allow you to indicate two points to draw a circle.
Copyright © 2021 ArCADiasoft
HOME | PRODUCTS | COMPANY | CONTACT | FOR RESELLERS


