


ArCADia BIM 11 - Own Aliases
Command aliases are usually a short name, we don't use function keys (Shift, Ctrl, Alt, F1-F12), only letters and numbers.
For example, to draw lines we do not have to click on the icon or enter LINE into the command area, for this command the alias L is defined by default.
This means that it is enough to type L in the command area and confirm with Enter or the right mouse button to start drawing lines.
Other useful aliases are:
- M for move,
- O for offset
- LTS for LTScale (line scale variable used in the paper area)
- PL for polylines and PLine also for polylines
Defining aliases is done in the Customize window, which we call up after right-clicking on the options on any ribbon and choosing Customize from the list ... You can also enter CUSTOMIZATION in the command area.
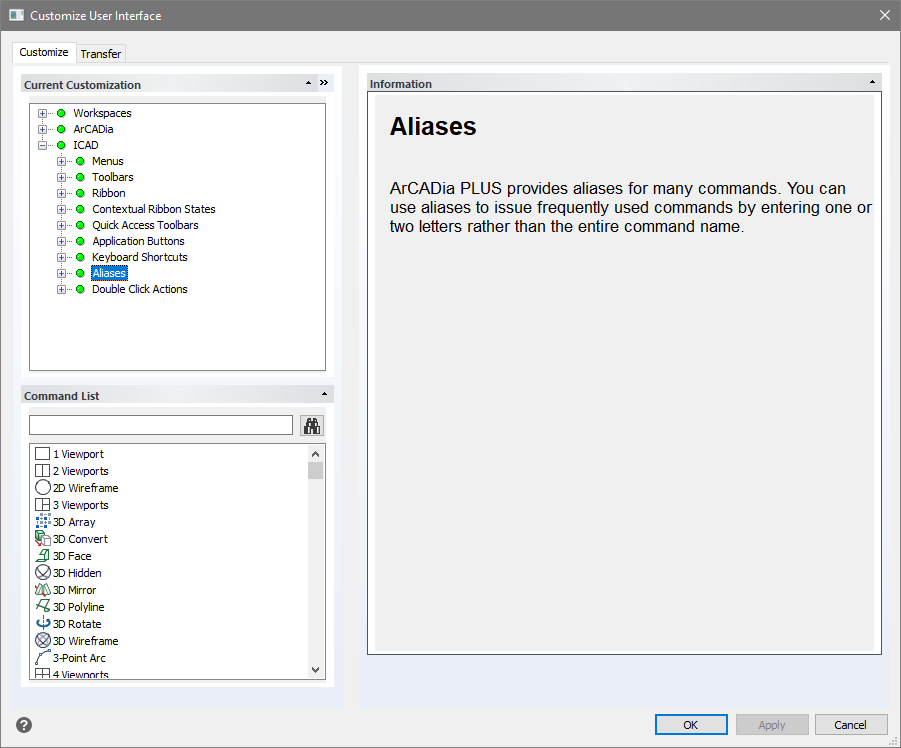
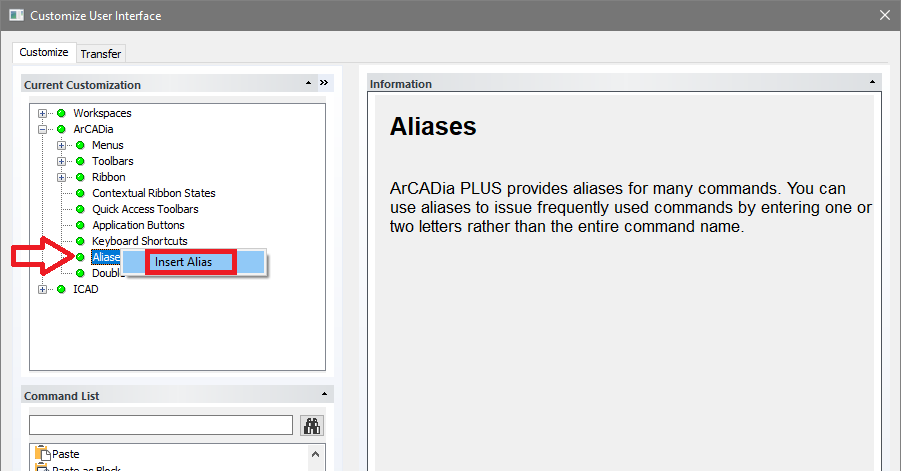
We select Aliases from the ICAD tree, i.e. from a graphic module that draws lines, solids, etc. Aliases for polylines (PL and PLine) are already defined in the program, but let's say they are not too intuitive. That is why we are defining a new alias for this command.
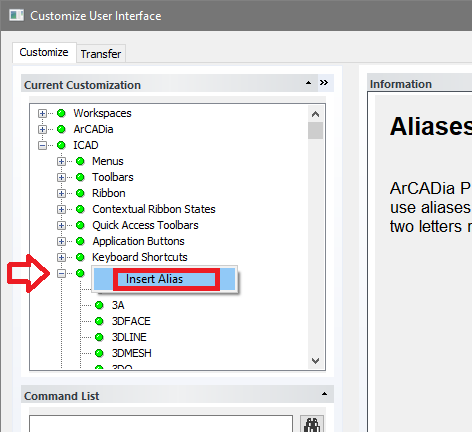
To do this, we right-click on the Aliases tree and select Insert Aliases from the small list. The window below will provide a field for entering an alias, and you will be able to enter the shortcut data on the left.
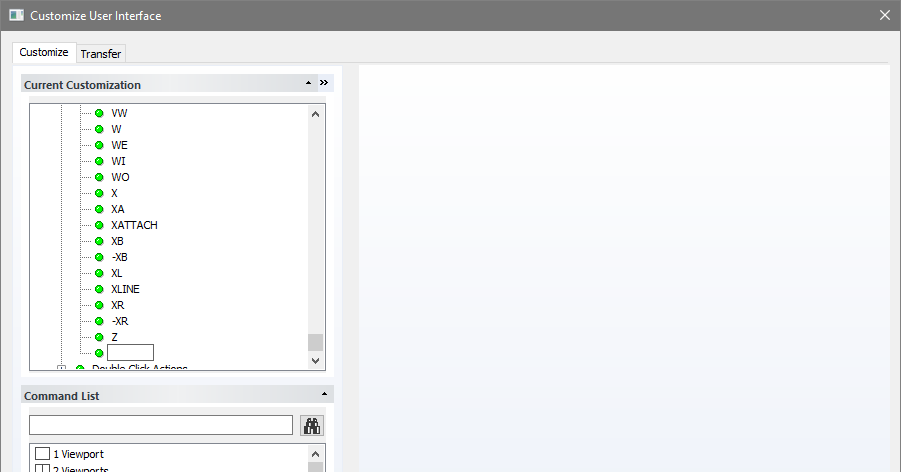
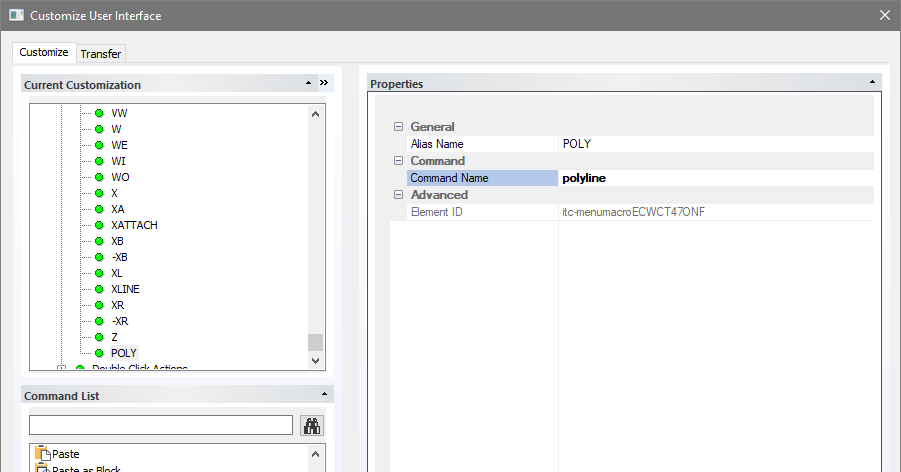
For example, POLI will be the new alias for polylines, so we type POLI. On the right hand side the alias name will be completed automatically, but we will have to fill in the Command Name, in which we enter the Polyline and confirm it with Enter.
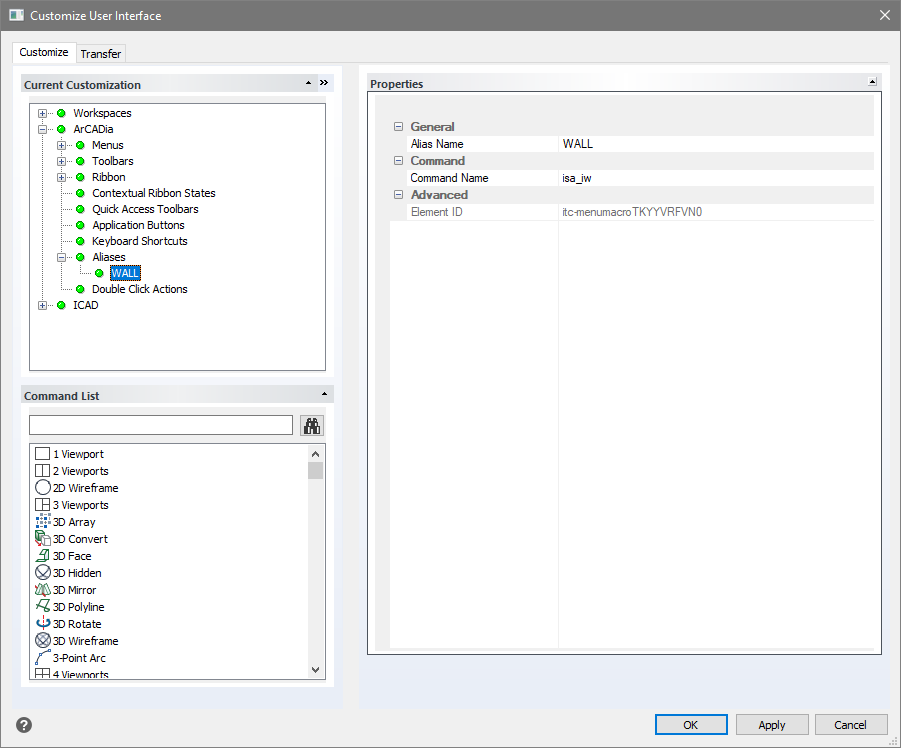
If we wanted to enter aliases, e.g. for ArCADia system commands, so as not to switch to the appropriate ribbons, but rather enter the commands manually, then we proceed similarly. The only difference is that in the tree on the left hand side we must choose Arcadia and Aliases. We click the right mouse button and choose command.
Let's say that we want to use the word wall to insert a wall. We type wall, confirm and on the right side in the Command Name enter isa_iw (because this is the name of the command calling up the wall) and confirm with Enter.
When you finish defining aliases, be sure to click Apply and OK.
It would be good just in case (e.g. transferring data to another computer) to copy .cui files and store them outside the standard location
(c:\Users\USER-NAME\AppData\Roaming\ArCADiasoft\ArCADia PLUS\11.1\).
USER-NAME - is the user you log in to on your computer.
Copyright © 2026 ArCADiasoft
HOME | PRODUCTS | COMPANY | CONTACT | FOR RESELLERS